NX7U
Scott Townley
Bridgewater, NJ
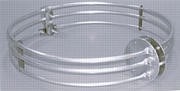
6 m 3-ring Halo antenna
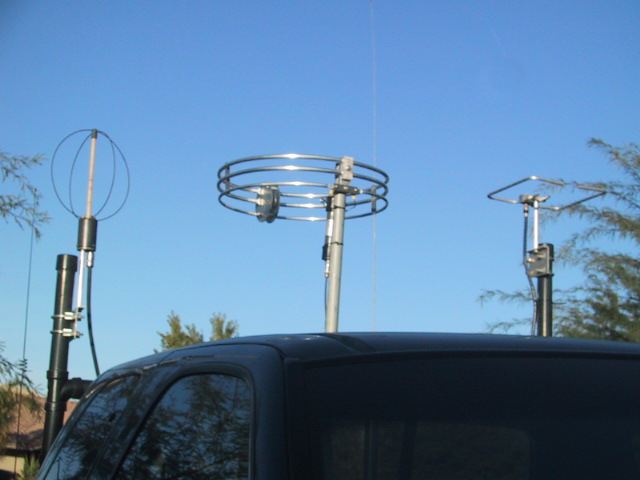
I get a lot of questions about this antenna, since I featured a newer clone on my previous webpage. I had mounted it on my old F-150 and it worked great for 6m.
For some reason, the three-ringed design just sticks in people's heads.
The original incarnation of this antennas was the "Hi-Par Saturn 6". These pics are stolen off the web.
Sometime in 2001 a fellow in Ohio (W8SMD) started selling a "Three Ring Halo Antenna" that was essentially a copy of the original. You can see a lot of similarity between the antenna above and below. (This is my old F-150 setup).
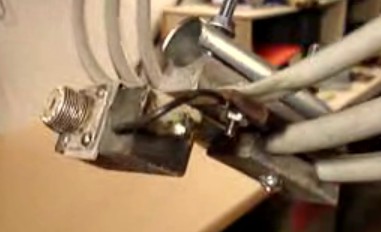
Anyway, the main question I get is, "I have one of these...now what? How do you attach the feedline?
The original Hi-Par came with a matching box built-on to the antenna (that's the box with the UHF/SO-239 connector on it). It's just a transformer. The 3-ring loop has about 12.5 ohms input resistance, so a 4:1 transformer is needed. The W8SMD version came with a schematic of the transformer so you could build it yourself. Here is a description:
You could easily make a little aluminum mounting bracket for the connector and transformer if you wanted.
An alternative is the so-called "Q-section". That's just a quarter-wave matching line. A line of characteristic impedance Z1 will match load Z0 to source Z2 if (1) the line is a quarter-wave (don't forget velocity factor!) and (2) Z1=sqrt(Z0*Z2). In our case, Z0=50 and Z2=12.5, so Z1=sqrt(625)=25 ohms.
Fortunately 25 ohm coax is easy to come by--just parallel two 50 ohm coax lengths. Just like resistors. At both ends, connect shield-to-shield and center-to-center. This makes the lines parallel. If you use small coax (like RG-58 or RG-8x mini) you can cram the two cables into a PL-259 no problem. For RG-58, the length works out to 37" for the lower end of the band.
| • |
Make a coil of 8 turns, 16 AWG copper. 2" long, 5/8" inner diameter. Leave a 3-1/2" lead on one end of the coil. Leave about 1" on the other. |
| • |
Using an SO-239 flanged panel mount connector: connector ground to the 3rd turn from the 3-1/2" lead; connect the other end of the coil (with the 1" lead) to the center pin. |
| • |
Connect a 3-1/2" pigtail wire 2 turns from the 1" lead end (or 6 turns from the 3-1/2" lead).
|
| • |
The two 3-1/2" leads connect to the center insulator--that's on the bottom ring, opposite the big circular plates. |
Feeding the Hi-Par/3 ring halo
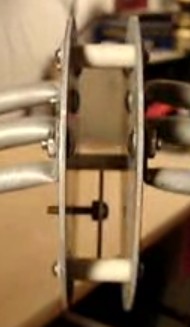
Adjusting and Tuning
There is a small, screw-tunable disk in-between the big endplate discs (you can see it in one of the old unit pictures). Simply adjust the screw (which changes the spacing of the smaller disc relative to the larger ones) to minimize SWR. Use a locknut to keep it in place.


")
")